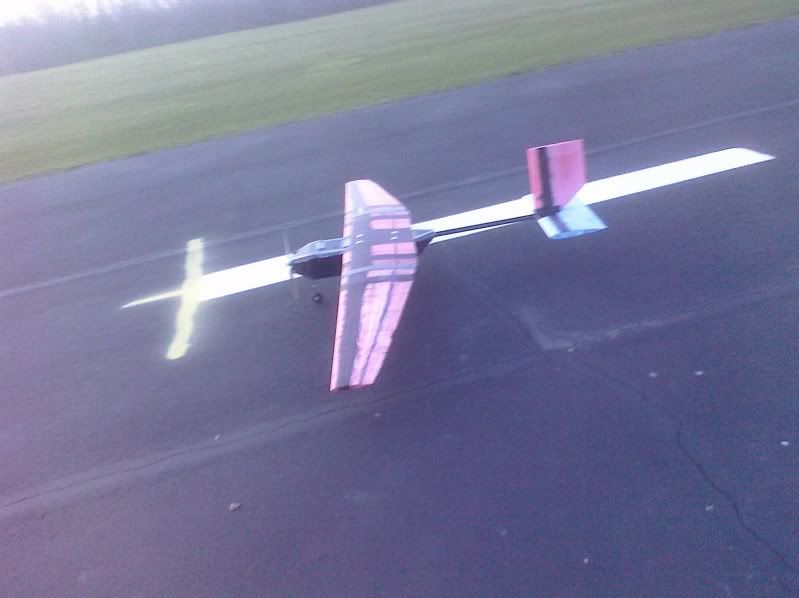
I'll admit, I've been putting off posting about the AIAA team. Not because of a lack of things to talk about, but because I've been having trouble laying hands on things to show. Since the last time I posted, the prototype has had about six flights, of varying degrees of success, and we've started working on our follow-up competition aircraft incorporating lessons learned making the prototype. However, video or images of those flights are not on the web yet, except for the rather pathetic maiden flight.
As Josh notes, the crash was not as bad as it looks, and the plane was flyable again after an hour or two of work. A little experimenting with motors and propellers found a combination that produced power more like we'd been anticipating, and the current setup is much faster and much better in the air. However, as I dais, I don't have any images or video of that I can point to yet. It's been a long time since I did a proper update, so in place of flight highlights, I'm going to post some images of what, in general, we've been up to. More awaits below the cut.
This year's plane differs in a number of ways from last year. First, after last year, there's a larger core team who generally know how to do what needs to be done. Our president, Josh Nieman, has really taken that core and pushed us to put those abilities to the best use possible, and it payed off: we flew before the paper was due, and incorporated some flight data into the paper, compared to last year when we flew about two months after the paper due date. Thanks to that, we're now able to spend the next month or so remaining before competition fine-tuning our configuration and building the competition plane, instead of desperately working to get one flyable plane.
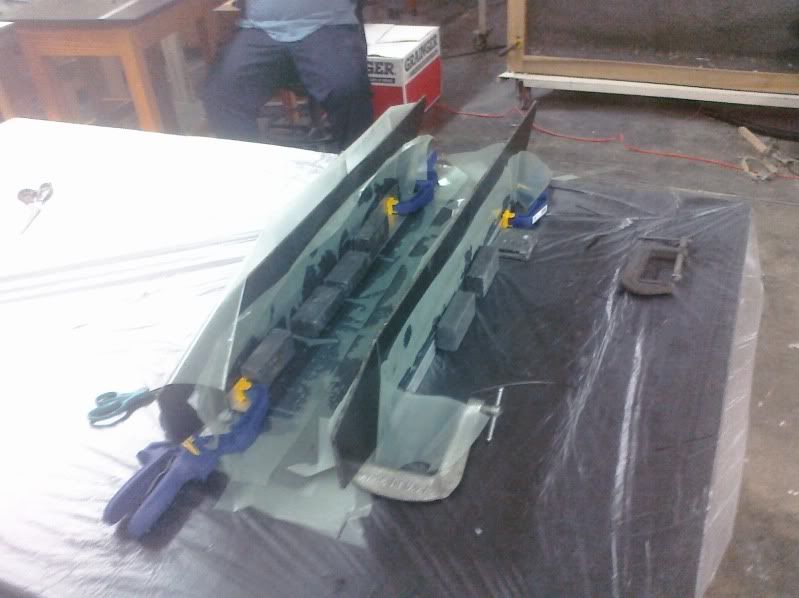
Another change from last year is our use this year of a molded fuselage, rather than a built up fuselage. What that means is that previously, our fuselage was built from discrete panels of carbon-fiber honeycomb, connected at the joints with carbon fiber strips. This required very complex build-ups, and was costly in terms of time and materials. An image of this process in action can be seen below--yes, this was infact every clamp in the shop in use at once.
 |
| First, we would build up the sides. |
 |
| We would bend the skin-hinges to shape the front and back of the fuselage. |
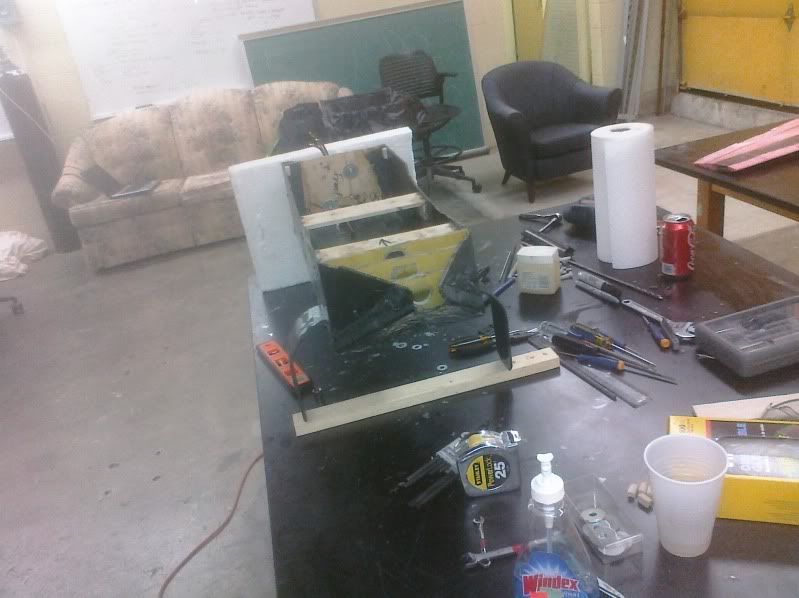 |
| Finally, we would add internal bulkheads and other structure. |
Overall, a very complex process. Note the couch in the background of the last picture. This couch was just as terrible as it looks, but it had over the years been beaten to the exact right level of comfort. I used to read on it while waiting for epoxy to dry. It was comfortable, but now it is gone due to safety rule changes. I miss it a lot. Regardless, the new process is a lot different. Instead of building up from panels, we're making use of a negative molding process with the assistance of
Industrial Fiberglass Specialties (who have provided the facilities and equipment required). To start, we make a core in the shape of the part we want to make. This core has to be just right, so it took us about three tries to get one right this year. I participated in the preparation of all three cores.
 |
| First core. Pretty, but unfortunately the wrong airfoil on the root section |
 |
| Second core. Produced in only about 10 hours. Correct wing section, but not pretty--didn't go together right. |
 |
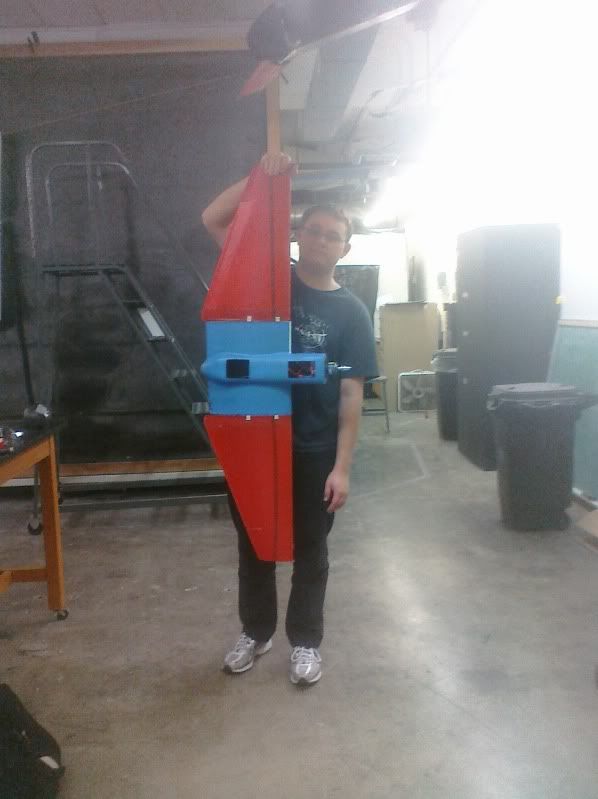
| Me with the third and final fuselage mold core after layup and waxing |
Next, we used this fuselage core to build up two molds for the fuselage. One makes the top of the fuselage, the other makes the bottom. Once this mold is made, we can make as many fuselages as we care to with only a few days work by laying new fiberglass into the molds. This is a large part of how we're making two planes this year when last year we were only able to make one. The molding technique reduces the time, effort, and cost of additional fuselages which in the old technique were the most effort and cost intensive element.
We also completed the connections on the plane. If you'll recall, a few moths ago I a diagram that showed the types of connections the plane was planned to use. If you don't, here's that post linked, and the diagram in question is reproduced below.
 |
| Connections used on aircraft |
It's interesting (to me anyway, and this is my blog, so that's what matters) to compare this to an image I took a few weeks ago of the plane disassembled to move to the testing field.
 |
| Aircraft disassembled in preparation for packing |
Other than the landing gear, you'll note that the plane above very much resembles the diagram above. I'm very proud of how the connections have moved from concept, to design, to execution this year without severe changes. Minor tweaks have been made to materials and some geometry, but the concept and designs are largely reflected in the aircraft as built, which is much more than I can say about last year's aircraft.
On the theme of dramatic images, some more from testing the connections. I made a test version of the wing spar connections before the prototype was built, and tested how well it stood up to shear and moment loads by cantilevering it over the edge of a workbench with weights on it. The image below shows the connection taking 24 pounds of shear load, and a applied moment of 12 pound-feet, equal to our plane in a 5 g turn with margin. As you can see clearly, the connections had no issues with even this overload.
We also added the wing locking connection recently. These wing locks prevent the wing from pulling off of the fuselage along the axis of the spar and alignment pins. In flight, these forces along the wing (known as "spanwise forces" in jargon) are fairly minimal, however, the connections we've designed are capable of taking fairly significant forces without issue, as demonstrated below.
 |
| Should have seen the one that got away.... |
In this image, the entire weight of the fuselage, batteries, motor, and the other wing are being applied to the port wing locks without issue. This ensures we have plenty of margin, and gives us a lot of resilience to damage. The overall size of the plane is also fairly visible in this image. I stand 6 feet, so you can get an idea of what a job we're doing getting these wings to fit into a conventional carry-on suitcase. We do it, though.


hey looks pretty sweet! what motor are you guys using?
ReplyDeleteNot sure off the top of my head. If you'll be at Tuscon, I can show you it, though.
ReplyDeleteyea we'll be in tucson but we are having thrust issues and are trying to see what the other teams have. how much does it weigh? ours weighs a little under 3 lbs.
ReplyDeleteThe plane overall is about 3.5 pounds, depending on which fuselage we use--V2 is a bit heavier, but it seems like V3 is cursed. Which team are you with?
ReplyDeleteI'm from New Mexico State, the Crimson Jett team. How many golf balls can you guys carry?
ReplyDelete28 or so by volume. We...ended up with more lift than we expected in terms of mass, but our fuselage can't fit more than that.
ReplyDeleteoh dang...
ReplyDeleteHeh. Any pics of your plane around? As I mentioned in my most recent post, I really enjoy talking about how different teams approach the problem of the specs, and I'd love to see what you guys did.
ReplyDeletewe dont have any online. ha we have a rival team from our own university that have been trying to spy on us so we've been rather secretive about it. can you post pictures through comments on here? or i can email them to you?
ReplyDeleteI don't think pictures can be posted in comments, though I haven't messed around with the full comments section potential. Email would perhaps be better if you want them under wraps? Mine is in my profile up on the upper sidebar.
ReplyDelete